Profile Manager Basics
Getting Started
Here are some basic steps to get you started when running the profile manager for the first time:

1) If your games are not installed in the default location be sure to open the settings window and update where the files are located. See Preferences and Settings Window for more information about how to do this.
Note: If you use script extenders (for example SKSE or OBSE) be sure to change the game’s exe setting to start the script extender executable while in the settings window.
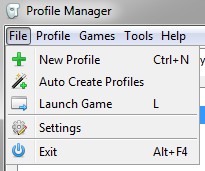
2) If you already have saved games, open the file menu and click “Auto Create Profiles” the Profile Manager will then sort your saved games into profiles, one for each character. If you don’t already have saved games open the file menu and click “New Profile”.
The other sections in this chapter cover the basics of how to use the profile manager, and explain what each buttons does and how to edit a profile.
Contents:
- Main Interface – Explains the basics of the main interface.
- Menus – Explains what each of the buttons in the menus do.
- Edit Profile Interface – Explains the edit profile window.
- Keyboard Shortcuts – Lists all the keyboard shortcuts used by the Profile Manager.